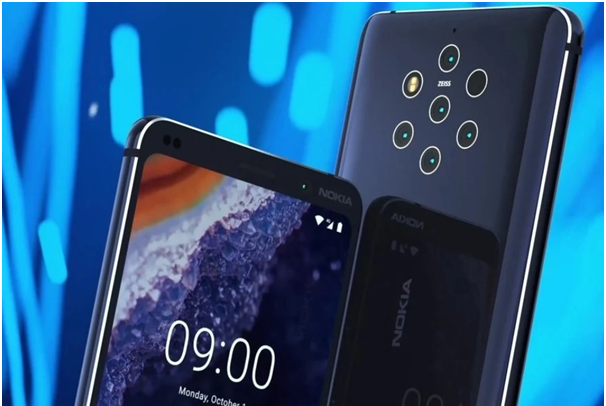
The basic guide to new Nokia 9 Pureview
In this guide you will come to know how to:
- Personalize your phone
- Open and close an app
- Notifications
- Control volume
- Google Assistant
- Screenshots
- Battery life
- Save on data roaming costs
- Write text
- Date and time
- Clock and alarm
- Accessibility
With simple to do tips you can get hands on the new Nokia flagship Nokia 9 Pureview. Just follow the steps as given below for some basic set up of your mobile when you start using it for the first time.
To personalize your mobile
You can personalize your home screen of Nokia 9 pureview with wall paper and ringtone
- To change your wallpaper Tap Settings > Display > Wallpaper.
- To change your phone ringtone Tap Settings > Sound. Then Tap Phone ringtone (SIM1) or > Phone ringtone (SIM2) to select the ringtone for respective SIMs.
- To change your message notification sound Tap Settings > Sound > Advanced > Default notification sound.
To open and close and app
- On the home screen, tap an app icon to open it. To open one of the apps running in the background, swipe up the home key then swipe right and select the app.
- To close an app Swipe up the home key and swipe up the app you want to close.
- To find your apps Swipe up the home key and swipe up again to see all your apps.
- To close all running apps Swipe up the home key , swipe right through all apps, and tap CLEAR ALL.
To use the Notification Panel
You can stay in touch with what’s happening on your phone with notifications.
When you receive new notifications, such as messages or missed calls, indicator icons appear on the status bar at the top of the screen. To see more information about the notifications, drag the status bar down. To close the view, swipe up on the screen.
- To open the notification panel, drag the status bar down. To close the notification panel, swipe up on the screen.
- To change the notification settings of an app, tap Settings > Apps & notifications and tap the app name to open the app settings. Tap Notifications. You can turn off or on the notifications per each app individually.
- To see notification dots, tap Settings > Apps & notifications > Notifications and switch Allow notification dots to on. A small dot will appear on the app icon, if you’ve got a notification, but haven’t attended to it yet. Tap and hold the icon to see available options. You can tap the notification to open it, or swipe to dismiss.
- To activate features, tap the quick settings icons on the notification panel. To see more icons, drag the menu down.
- To rearrange the icons, tap mode_edit, tap and hold an icon, and then drag it to another location.
To Control Volume
If you have trouble hearing your phone ringing in noisy environments, or calls are too loud, you can change the volume to your liking by using the volume keys on the side of your phone.
Do not connect to products that create an output signal, as this may damage the device. Do not connect any voltage source to the audio connector. If you connect an external device or headset, other than those approved for use with this device, to the audio connector, pay special attention to volume levels.
- To change the volume for media and apps Press a volume key on the side of your phone to see the volume status bar, tap settings, and drag the slider on the volume bar for media and apps left or right.
- To set the phone to silent, press the volume down key, tap notifications_none to set your phone to vibrate only and tap vibration to set it to silent.
- To silence an incoming call, press the volume down key. You can also set your phone to mute the ringing when you pick the phone up: tap Settings > System > Gestures > Mute on pickup, and switch to on.
- If you want to be able to reject an incoming call by turning over the phone, tap Settings > System > Gestures > Turn over to reject call, and switch to on.
To use Google Assistant
Google Assistant is available in selected markets and languages only. Where not available, Google Assistant is replaced by Google Search. Google Assistant can help you search information online, translate words and sentences, make notes and calendar appointments, for example. You can use Google Assistant even when your phone is locked. However, Google Assistant asks you to unlock your phone before accessing your private data.
- To turn on your Google Assistant, tap Google app . At the bottom right, tap More > Settings > Voice. Tap Voice match and turn on Access with voice match.
- To wake up Google Assistant there are several ways to do so
- Tap Google app and say Ok Google or Hey Google. Tap mic. If your phone is locked, just swipe mic to start Google Assistant.
To take Screenshots
To take a screenshot, open the notification panel, and drag the status bar downwards. Tap Screen capture. You can view captured images in Photos.
It is not possible to capture a screenshot while using some apps and features.
To improve Battery Life
Get the most out of your phone while getting the battery life you need. There are steps you can take to save power on your phone.
- To extend battery life Always charge the battery fully. Mute unnecessary sounds, such as touch sounds. Tap Settings > Sound > Advanced, and under Other sounds and vibrations, select which sounds to keep. Use wired headphones, rather than the loudspeaker.
- Set the phone screen to switch off after a short time. Tap Settings > Display > Advanced > Sleep and select the time.
- Tap Settings > Display > Brightness level. To adjust the brightness, drag the brightness level slider. Make sure that Adaptive brightness is disabled.
- Stop apps from running in the background: swipe up the home key and swipe up the app you want to close.
- Enable Battery Manager. Limit battery for apps that you don’t use often. The notifications may be delayed for these apps. Tap Settings > Battery > Battery Manager.
- Switch on the power saver: tap Settings > Battery > Battery saver, and switch to On.
- Use location services selectively: switch location services off when you don’t need them. Tap Settings > Security & Location > Location, and disable Use location.
- Use network connections selectively: switch Bluetooth on only when needed. Use a Wi-Fi connection to connect to the internet, rather than a mobile data connection. Stop your phone scanning for available wireless networks. Tap Settings> Network & Internet > Wi-Fi, and disable Wi-Fi. If you’re listening to music or otherwise using your phone, but don’t want to make or receive calls, switch the airplane mode on. Tap Settings > Network & Internet > Advanced > Airplane mode. Airplane mode closes connections to the mobile network and switches your device’s wireless features off.
To save on data roaming
You can cut data roaming costs and save on your phone bills by changing mobile data settings. To use the optimal connection method, change the Wi-Fi and mobile networks settings.
Data roaming means using your phone to receive data over networks that your network service provider doesn’t own or operate. Connecting to the internet when roaming, especially when abroad, can increase data costs substantially.
Using a Wi-Fi connection is generally faster and less expensive than using a mobile data connection. If both Wi-Fi and mobile data connections are available, your phone uses the Wi-Fi connection.
Connect to a Wi-Fi network Tap Settings > Network & Internet > Wi-Fi. Make sure Wi-Fi networking is turned on. Select the connection you want to use. Close the mobile data connection Swipe down from the top of the screen, tap Mobile data and switch Mobile data off.
To follow your data usage, tap Settings > Network & Internet > Data usage.
How to write text quickly and efficiently using your phone’s keyboard
- Writing with the on-screen keyboard is easy. You can use the keyboard when holding your phone in portrait or landscape mode. The keyboard layout can vary in different apps and languages.
- To open the on-screen keyboard, tap a text box. Switch between upper and lower case characters
- Tap the shift key. To switch caps lock mode on, double-tap the key. To return to normal mode, tap the shift key again.
- Type in a number or special character Tap the numbers and symbols key. Some special character keys bring up more symbols. To see more symbols, tap and hold a symbol or special character.
- To Insert emojis Tap the emoji key, and select the emoji.
- To Copy or paste text Tap and hold a word, drag the markers before and after the word to highlight the section you want to copy, and tap COPY. To paste the text, tap where you want to paste the text and select PASTE.
- To add an accent to a character Tap and hold the character, and tap the accent or the accented character, if supported by your keyboard.
- To delete a character Tap the backspace key.
- To Move the cursor To edit a word you just wrote, tap the word, and drag the cursor to the place you want.
- To use keyboard word suggestions. Your phone suggests words as you write, to help you write quickly and more accurately. Word suggestions may not be available in all languages.
- When you start writing a word, your phone suggests possible words. When the word you want is shown in the suggestion bar, select the word. To see more suggestions, tap and hold the suggestion.
- If the suggested word is marked in bold, your phone automatically uses it to replace the word you wrote. If the word is wrong, tap and hold it to see a few other suggestions.
- If you do not want the keyboard to suggest words while typing, turn off the text corrections. Tap Settings > System > Languages & input> Virtual keyboard. Select the keyboard you normally use. Tap Text correction and switch off the text correction methods you do not want to use.
- To correct a word if you notice that you have misspelled a word, tap it to see suggestions for correcting the word.
- To switch spell checker off Tap Settings > System > Languages & input > Advanced > Spell checker, and switch Spell checker to Off.
To set Date and Time
Keep track of time – learn how to use your phone as a clock, as well as an alarm clock, and how to keep your appointments, tasks, and schedules up to date.
- To set date and time Tap Settings > System > Date & time.
- To update the time and date automatically. You can set your phone to update the time, date, and time zone automatically. Automatic update is a network service and may not be available depending on your region or network service provider. Tap Settings > System > Date & time.Switch Automatic date & time on. Switch Automatic time zone on.
- To change the clock to the 24-hour format. Tap Settings > System > Date & time, and switch Use 24-hour formaton.
To set Clock and alarm and Use the countdown timer
- Tap Clock > TIMER. Set the duration of the timer.
- Use the stopwatch to see how you improve on the running track. Tap Clock > timer STOPWATCH.
- You can use your phone as an alarm clock. Tap Clock > access_alarm ALARM. To add an alarm, tap add_circle. To modify an alarm, tap it. To set the alarm to repeat on specific dates, check Repeat and highlight the days of the week.
- If you don’t want to get up just yet, when the alarm sounds, swipe the alarm left. To adjust the snooze length, tap Clock > more_vert> Settings > Snooze length and select the length to your liking.
- When the alarm sounds, swipe the alarm right.Tap Clock > access_alarm ALARM. Select the alarm, and tap delete Delete.
For Accessibility you can change various settings to make using your phone easier.
- Increase or decrease the font size Tap Settings > Accessibility. Tap Font size. To increase or decrease the font size, drag the font size level slider.
- To Increase or decrease the display size Tap Settings > Accessibility. Tap Display size and to adjust the display size, drag the display size level slider.
Now use your new Nokia 9 Purview with ease. Good luck!


